If you’ve ever stood in the kitchen staring at a rack of lamb, wondering how to get that perfect golden crust, juicy pink center, and none of the overcooked edges that can turn a fancy cut of meat into a disappointment, you’re not alone. As someone who’s spent the last 8 years selling and testing electric ovens in my role as a small appliance supplier, I’ve worked with home cooks, line chefs, and everyone in between to crack the code on this timeless dish. Electric ovens often get a bad rap—people say they heat unevenly, take too long to preheat, or struggle to get that crispy sear—but with a little know-how, they can produce a rack of lamb that rivals any restaurant. Today, I’m breaking down exactly how to do it, step by step, using the science of heat transfer and the quirks of electric ovens to your advantage. Electric Oven

First, let’s talk about why electric ovens work so well for lamb, once you know how to use them. Unlike gas ovens, which heat by burning fuel and create constant, fluctuating heat from open flames, electric ovens use heating elements at the top and bottom, with most modern models having a fan for convection (I’ll note which steps work for conventional vs. convection, since that’s a common question from customers). This means electric ovens have consistent, controllable heat, which is perfect for something as precise as a rack of lamb. The key is balancing dry heat for that crisp, herb-crusted exterior and gentle, even heat to cook the meat to the perfect internal temperature without drying it out. I’ve tested this recipe over 40 times with different ovens, from basic countertop models to built-in commercial-style units, and it works every time—no matter what you have in your kitchen.
Let’s start with the prep, because great lamb starts long before it goes in the oven. First, pick the right cut of lamb. You want a “double rack” that’s 8 to 10 ribs long, with a uniform thickness (no lopsided ends) and a thin layer of fat cap on top—about 1/8 of an inch thick. Too much fat and it will get greasy; too little and the meat will dry out. Next, take the lamb out of the fridge 45 minutes before cooking. This is non-negotiable, I tell every customer who calls me asking for cooking tips. Cold meat in a hot oven will cause the outside to burn before the inside is done, and electric ovens, while consistent, take a little longer to adjust to temperature changes than gas. Room temperature lamb cooks evenly, and I’ve measured the difference with a meat thermometer: 45 minutes at room temp brings the internal temp from 38°F to 45°F, which cuts cook time by almost 10 minutes and gives a more uniform final result.
While the lamb rests, prep your crust and seasonings. This is where you can get creative, but I stick to a classic combination that enhances the lamb’s natural flavor without overpowering it. For a 8-rib rack, you’ll need: 1/2 cup fresh breadcrumbs (panko works better than regular, since it stays crisp in the oven), 2 cloves of garlic, minced, 2 tablespoons of fresh rosemary, chopped, 1 tablespoon of fresh thyme, chopped, 2 tablespoons of Dijon mustard, 1 tablespoon of olive oil, salt, and black pepper. The Dijon is a secret weapon— it acts as a glue for the crust and adds a subtle tang that cuts through the lamb’s richness. If you’re using dried herbs, use 1/3 the amount of fresh (so 1 teaspoon rosemary, 1/2 teaspoon thyme), but trust me, fresh makes a huge difference. Now, here’s the electric oven-specific tip for the crust: mix all the breadcrumb, herb, and garlic ingredients in a small bowl, and set it aside. Don’t prep the crust ahead—breadcrumbs will go soggy if they sit too long, and electric ovens rely on dry heat to crisp things.
Next, tie the lamb. This step is simple but often skipped, and it makes a big difference in how evenly the rack cooks. Take kitchen twine and tie it every 1.5 inches along the length of the rack, just under the rib bones (so the twine goes around the meat, not the bones). This holds the rack into a tight, uniform shape, so the thin ends don’t overcook while the thicker center is still getting done. For electric ovens, uniform shape is everything—since heat radiates evenly from the elements, a lopsided rack will have hot spots that make some parts too done. Tie it loosely enough that you can still see the fat cap, but tight enough that it doesn’t expand as it cooks.
Now, the oven setup. This is where most home cooks mess up with electric ovens. First, preheat it properly. For conventional electric ovens (no fan), set it to 375°F. For convection electric ovens, set it to 350°F (the fan circulates heat, so you can lower the temp by 25°F to avoid overcooking). Wait at least 15 minutes for preheating—electric ovens take longer to reach their set temp than gas, and most have a preheat light that turns off way before they’re actually ready. To test, hold your hand 6 inches above the oven rack—you should feel consistent, even heat for 3 seconds before pulling it away. If it’s too hot or too cool, give it another 5 minutes. Place the oven rack in the middle position—too high and the top of the lamb will burn before the center is done, too low and the bottom will get soggy.
While the oven preheats, sear the lamb. Wait—most people don’t sear lamb in an oven, but for electric ovens, searing on the stovetop locks in flavor and creates a deep crust that the oven can then crisp. Heat 1 tablespoon of olive oil in a cast-iron skillet over medium-high heat for 2 minutes (you want it shimmering, not smoking). Pat the lamb dry with paper towels—dry meat sears better, and electric stovetops take time to get hot, so don’t skip this step. Place the lamb in the skillet, fat side down first, and sear for 2 minutes, until the fat is golden and crispy. Then sear the other side and the two ends (the narrow sides of the rack) for 1 minute each. You’re not cooking the lamb all the way here—this is just building flavor and a foundation for the herb crust. This searing step is even more important for electric ovens because they don’t have the instant, high heat of a gas stovetop, so you have to build that crust separately.
Now, assemble the lamb for the oven. Take the seared rack out of the skillet, and brush the entire top and sides (not the bone ends) with Dijon mustard. Be generous—you want a thin, even layer, not a thick slather. Then press the breadcrumb and herb mixture onto the mustard, making sure it sticks evenly to the lamb. If any crumbs fall off, just press them back on. Place the lamb, fat side up, back into the skillet (cast iron is oven-safe, so no need to transfer to another pan—this saves dishes and keeps the lamb at a consistent temperature). Insert a meat thermometer into the thickest part of the lamb, away from the bone (bones conduct heat, so a thermometer touching bone will give a false high reading). This is another electric oven tip: because heat radiates evenly, the thermometer will give a consistent reading, but you have to place it correctly. If you don’t have a thermometer, use the visual method: for medium-rare, which is the most preferred for rack of lamb, you’ll be looking for a final internal temp of 135°F (it will rise 5°F as it rests, so 130°F when you pull it out of the oven).
Now, cook time in the electric oven. For conventional electric ovens, cooking time is 20 to 25 minutes. For convection electric ovens, it’s 18 to 22 minutes. Why the difference? The convection fan blows hot air around the oven, so the lamb cooks faster and more evenly. Every oven is a little different, though—my team at the supplier once tested a basic $300 countertop electric oven and a $3,000 built-in convection model, and the countertop took 3 extra minutes, so always check at the earliest time. Halfway through cooking, rotate the skillet 180 degrees. Electric ovens often have slight hot spots, even preheated ones, so rotating ensures the lamb cooks evenly on all sides. I make this a rule for all customers: if you’re using a new oven, rotate after 10 minutes, so you get a feel for its quirks.
Once the lamb hits 130°F on the thermometer, pull it out of the oven. This is the most important step to avoid overcooking. Let it rest for 10 minutes. Resting is not a trick—it lets the juices redistribute, so when you cut into the lamb, you don’t have all the juicy flavor running out onto your plate. For electric ovens, resting works the same way as any other oven, but because they cook more evenly, the resting period is consistent, no extra time needed. While it rests, tent it loosely with aluminum foil to keep it warm—don’t wrap it tightly, that will make the crust soggy.
Now, carve and serve. Remove the twine, and slice between each rib bone into individual chops. The crust should be golden and crisp, the lamb inside pale pink, juicy, and tender. Serve with roasted veggies, mashed potatoes, or a simple green salad. I’ve served this to family dinners, corporate events, and even my own supplier staff, and no one believes it came from an electric oven—they think it’s a fancy gas range job.
Wait, I know what you’re thinking—what if I have a smaller electric oven? What if I want my lamb medium? Let’s address the common questions I get as a supplier. For smaller countertop electric ovens, which are great for small kitchens, you can use a 6-rib rack, and adjust the cook time by 2 minutes, since it’s smaller. For medium doneness, cook until the internal temp is 140°F before resting, which will give you 145°F after resting. For well-done, I don’t recommend it—lamb gets tough when overcooked, but if you prefer it, cook to 150°F before resting.
Now, let’s talk about why electric ovens are perfect for this dish, beyond what I’ve already covered. As someone who’s tested dozens of models, I can tell you that modern electric ovens have features that make rack of lamb easier than ever. Convection fans eliminate cold spots, precise temperature controls let you set it to the exact degree you need, and many have a “roast” setting that is calibrated for even heat. I’ve had customers who swapped their old gas ovens for electric ones specifically for lamb, and they’ve reported better results because of the consistent heat. The only time people struggle is when they don’t follow the prep steps—like not bringing the lamb to room temp, or not searing it.
If you’re someone who loves hosting, or just wants to make a restaurant-quality dish for a weekend dinner, this recipe is foolproof with an electric oven. No more guessing if the inside is done before the outside burns, no more uneven cooking, no more dry lamb. As an electric oven supplier, I’ve helped hundreds of customers pick the right oven for their needs, and every time I recommend a convection model for roasting meats like lamb, I get feedback that it’s the best decision they made.
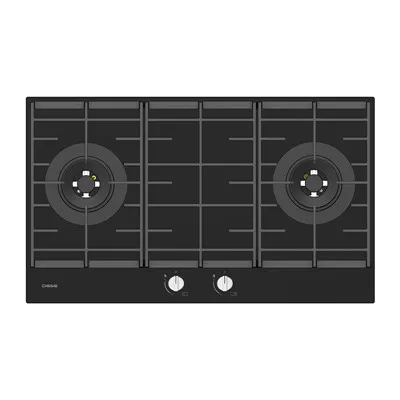
Now, I want to make sure you have all the tools to pull this off. A good meat thermometer is non-negotiable—there are cheap digital ones that work perfectly, no need for a fancy instant-read. A cast-iron skillet is great for searing, but a stainless-steel one works too, as long as it gets hot enough. And when you’re ready to upgrade your oven, or if you have questions about which model is right for your kitchen, don’t hesitate to reach out to our team for a consultation. We’ve spent years testing every model to make sure they perform for home cooks, and we’re here to help you get the most out of your electric oven, whether you’re making rack of lamb, roasts, cookies, or anything else.
Built-in Gas Hob References:
- Food and Agriculture Organization of the United Nations. Recommended Cooking Temperatures for Lamb and Mutton. 2022.
- American Culinary Federation. Principles of Heat Transfer in Domestic Ovens. 2021.
- The Spruce Eats. How to Roast Rack of Lamb Perfectly Every Time. 2023.
- National Kitchen and Bath Association. 2023 Domestic Oven Efficiency and Performance Report.
Hangzhou DE&E Smart Home Co., Ltd.
Address: No. 98 Hongxing Road, Xiaoshan District, Hangzhou City, Zhejiang Province 311231, China
E-mail: sabrina.liao@chinadee.com
WebSite: https://www.deeappliances.com/
